
Hindsight’s a great thing, right? There’s always stuff we’d do a little differently, looking back – and it’s certainly true with my iPhone photography.
Usually I’d be reluctant to post these ‘golden oldies’ here, but one thing I’ve seen in mentoring sessions is how useful direct analysis and practical editing tips & suggestions can be. We’ve all sat at some point with an image in front of us that doesn’t quite match our vision, unable to figure out why. A retrospective look at your own work can really help to tease out the answers.
Part one of this series was here. Below are a few more snaps from my first year on Instagram, give or take. Keep in mind when reading that this is simply a reflection on my own style, and not me writing a ‘rule book’ for how to take a good instagram or photograph or anything like that. This is just what works, and what doesn’t, for me :).


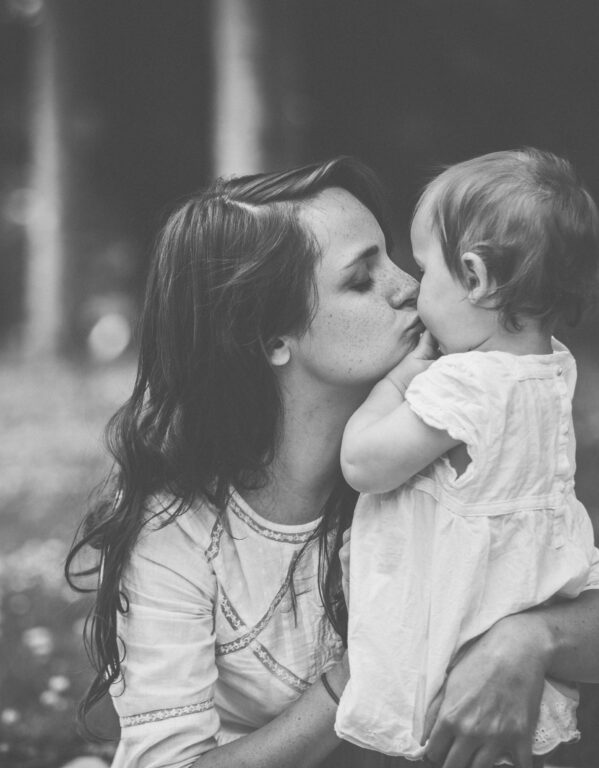
I’m reluctant to class this a mistake, because I do still kind of love this shot. It’s a good example though of how not being completely straight on to your object can throw out distracting perspective and lines. Because instagram’s ‘gallery’ style works on squares within a grid of more squares, lines that aren’t totally vertical or horizontal tend to stick out. If it’s deliberate, fair enough – but this wasn’t, and it drove me a bit mad at the time.
How I’d do it now: With the newer Instagram update and apps like SKRWT, composition errors like this can be fixed pretty well before posting now – but I could have taken a better picture in the first place by just bobbing down so my camera was level with my subject, Orla’s hands.


This falls under the category of ‘not my best’. If you read the Instaretreat (it’s free!), you’ll know I urge people only post images that they feel totally happy with to their gallery, if they’re looking to grow. I didn’t with this one, as my caption suggests – there is too much grain and a total lack of sharpness. Looking at it now I can tell I took it with a self timer & the front-facing iPhone camera – probably so I could see on screen when I was correctly aligned for the shot. I also seem to have taken this in low light then cropped in quite closely, exacerbating all that noise and blur. It’s a nice composition, very Instagrammy, but the picture quality just wasn’t up to scratch.
How I’d do it now: Pick a brighter spot, and use a better camera. The ‘selfie’ camera in the iphone is rubbish resolution and I don’t recommend ever using it for any ‘proper’ iPhone photography, but a more modern iPhone’s back camera would have coped with this shot just fine. There’s also a few tweaks you can apply post production to improve lack of sharpness or noise – my favourite is the de-noise tool you can purchase through the Photoshop iPad app, which seems to do the best job I’ve found.


What do you do when you need a seamless white background with even light, and you have a dark, shadowy house? Shoot your product shots in the bath, of course!
How I’d do it now: I’d start by removing that long brown hair of mine that’s mingled in with the glitter – ugh! (sidenote: why does hair become instantly disgusting once it is no longer attached to your head? Weird, no?). The glitter is throwing off a couple of lovely twinkly artifacts in the shape of those little hexagon sparkles near the top, so I’d probably try using another light source to get a bit more of that going on. All that being said, I’m not sure I’d stage a shot like this now. It was for one of my first ever giveaways, and I was still figuring out my own style, I suppose.


This one is over-processed and over cropped – losing all context and meaning in the process. I seem to remember running this through several filters to get these colours, simply because I wanted it to match the other pictures in my account at the time, which all included lots of light. It’s a lovely moment captured – Orla running to Rory on a day out at Yorkshire Sculpture park, but the end result isn’t really a shot to treasure.
How I’d do it now: I’d back away from the filters, fast. This is an example of me learning the hard way that putting your ‘gallery view’ over the quality of your images will lead you astray. If I take a picture now that really jars with my current gallery, I might hold onto it until a better time to post, rather than choke the picture with editing like this.


This is from a time when I was starting to feel more confident with my iPhone (4!) camera. It’s testament to how much knowing your camera and how it handles light can affect your images – the background here is a frosted window film with daylight coming through, which is why the detail in the orchid petals show. I remember a friend saying at the time ‘your phone takes really good photos’ – the truth is, it took the same photos as everyone else’s, but I was beginning to understand how to use it.
What I’d do now: Probably much the same! I even like the edit on this picture, and my only regret is that I didn’t dig out my proper camera and get a sharper shot. Macro on the iPhone isn’t my strength, though it’s definitely possible for people with less shaky hands!
Totally overexposed – I’d clearly taken this under artificial light, then tried to compensate for that a bit by dialling up the exposure even more, and blowing out all the detail in the white areas.
How I’d do it now: Not take it under artificial light, for starters. I’ve never really managed to make an artificially lit iPhone shot look natural, but there are things you can do to help a little bit – drop the exposure a few notches, dial down the temperature/white balance until your whites show no yellow, and play around with contrast and highlights to try and get a more even balance. To avoid overexposed photographs, tap the brightest area on your iPhone screen before shooting, and the exposure will automatically adjust. I generally recommend erring on the side of slightly underexposed for iphpne shots – you can always brighten a photograph up, post production, but if the detail is missed, nothing can put it back in.
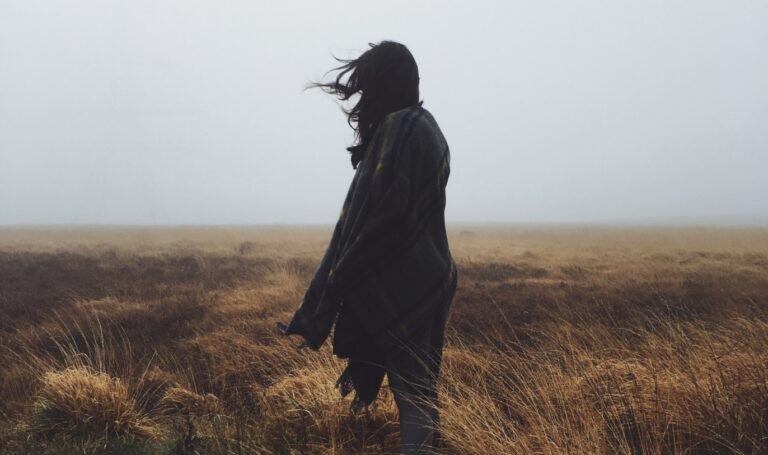
The composition is off here – all slanted angles, and far too much yellow filter. I probably saw how it made the colours brighter and went with that, not thinking about the overall effect. It’s an interesting scene though, and one I’d still love to snap today – this was one of the few bright spots on the otherwise dreary street where we lived at the time.
How I’d do it now: I should have stood straight on or straightened in-app – it’s a slightly downward tilting angle which I usually avoid, but necessary here to show the pavement. If I was feeling brave enough to tiptoe into their yard, I could have tried a classic Insta looking-down-at-my-feet number. Applying a less yellow, more natural filter would show the colours far better.


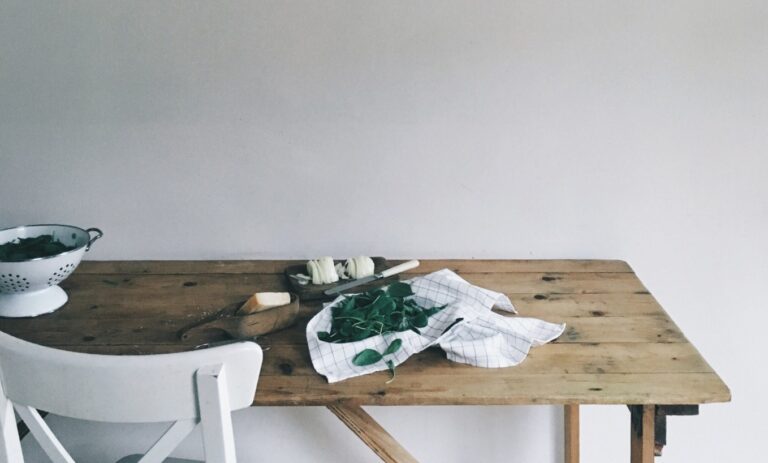
Composition, tones, clarity are all good here, but the subject is just zzzz. There’s actually a nice bit of story behind it – we’d found a new favourite park out of the city and started going every weekend and getting brunch from this little coffee van – buttermilk pancakes and syrup, hot black coffee & we’d sit on benches under the falling leaves, with Orla bundled up in her pram. None of this was reflected in the caption though, so this pic remained a fairly pretty snoozefest.
How I’d do it now: Use my caption to tell the story, explain why I’m sharing it. Maybe look for a slightly more interesting composition, or add something else to the shot to give it a bit more context.
How has your photography style evolved over time? Do you agree or disagree with my assessments above?
Hashtags for Instagram
Every month, I gather up a selection of winning hashtags and send them straight to your inbox, for free.
Sign up to receive my newsletters every month.


13 Comments
Leave a Comment
Olivia
November 10, 2015
such a great tutorial, love your openness & sharing your snippets of advise by demonstrating them on your own work… makes it all come to life & the penny drops quicker!!
have signed up to your 7 days to better iG .. just hoping to have a clear run of days in a row to work on improvement. thanks lovely. olivia X
Sara Tasker
November 10, 2015
Thanks Allysia – really glad it’s helpful! Yes, regardless what we’re aiming for with our instagram accounts, taking good smartphone photos is a great skill to have these days! x
Sara Tasker
November 10, 2015
Thanks Flavia! I’m so glad it’s useful for you. 40 followers is great from making such a simple change – I’m sure you’re going to go fro strength to strength! Looking forward to hearing more from you! S xx
Sara Tasker
November 10, 2015
Thanks Amber! I’m really glad it was helpful. I hate those Instagram nervy moments – still get them, but I’ve learned to let it pass and keep going! Stick with it! xxx
Sara Tasker
November 10, 2015
Oh thanks Jules – I love that you remember them so fondly. I feel the same about your account! I sort of love these early shots because they were so honest, and capture that time in my life in a way that my shots these days maybe don’t always. Not that my shots aren’t honest these days, but a bit more effort goes into some of them, I suppose. Ah well! x
Sara Tasker
November 10, 2015
Haha you’re welcome Grace! Although wonky has its charms sometimes for sure 🙂 x
Sara Tasker
November 10, 2015
Thanks Medusa! I totally agree 🙂 x
Medusa Dollmaker
November 10, 2015
It’s very good to learn from mistakes, always teach how to improve. Great post.
Grace Farrimond
November 10, 2015
I’m slightly bad for taking wonky photos and then posting them without looking, onto my Instagram account so thankyou for reminding me!
Julia Williams
November 10, 2015
I loved seeing these shots again. I remember almost all them, and I remember thinking when I first happened upon your account that it was total loveliness, how you made motherhood look so sweet, and how it was then and is now one of a handful of feeds that I’ll seek out to ensure I don’t miss out on your posts. So interesting to read your analysis on each of these, and I agree with you – but – I also love the style of your early shots. And actually I disagree about the first one with Orla’s hands – I love everything about that photo xx
Amber
November 09, 2015
So so good to read these, thank you for taking the time for think about them (though I know you didn’t do it for our sake!) and for sharing them! I’m still getting to grips with my blog’s Instagram and have just been having a nervy moment, so this was perfectly timed! Xx
Flavia
November 09, 2015
Your advices about photography are always very useful! I’ll going to start my instaretreat very soon (I think the next Monday) but I read your e-book and I’ve already re-organized my gallery, I choose what style I want for my photos, and in the last month I gained 40 followers! (for me is really impressive).
Allysia K
November 09, 2015
This is a really useful post! My instagram followers are mainly friends, but I’d still like to take better pictures. Thanks!